Saved Searches are one of the cornerstones for data extraction from NetSuite. This post looks at some of the basic elements of saved searches as a guide to get you started.
A saved search is a request for data from the NetSuite database which is flexible and user friendly. It allows you to report on, extract and analyse data from the NetSuite database. They can be applied to any data type so think a lot wider than the typical financial data you will be reporting on.

Here are the main steps for setting up a saved search:
Getting started
You can access saved searches from Reports>Saved Searches. If you are implementing NetSuite there will be some preconfigured searches, and your implementation partner should have created some for you. When setting up new saved searches it can be easier to base them on existing searches or you have the option to create new searches from scratch.

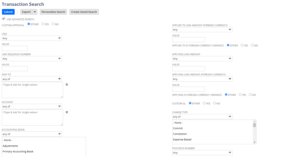
When creating a new search, the first step is to select the search type. This will define the record type or subtype that your saved search will be built around. You will be able to extract data from associated record types one level removed. Most financial data is stored in transaction record type.
Once the type is selected you will get options for the criteria. Click on Use advanced search to get a more complete list of options.

Selecting Saved Search Criteria
Select the criteria you would like to base you saved search on. You can easily edit and refine this later. One tip when selecting criteria is that Main Line to limit results to the main line of a transaction, rather than the item sublist line.
Define Saved Search Results

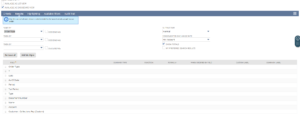
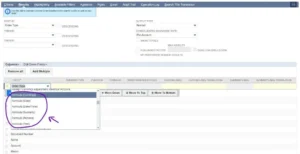
Next step is to define your results. Here you select the data fields that you will report on. On the Results tab you have some of the following options:
- Sort by. This will allow you to sort your saved search in by any field.
- Output Type. I typically select normal as there is not a lot of difference between other types and it can be difficult to represent saved searches directly as graphs.
- It is important that the consolidated exchange rate is set correctly for any foreign currency amounts in the search are translated using the correct rate.
- Selecting Group in Summary Type will allow you to create a summary page on the search and group by the selected field. You can then present the sum, max, min etc of amounts or other numeric data.
- Formulas allow you to add SQL Expressions to the saved search. To set a formula in the results tab, you will need to select a field that is prefixed with formula. From here you will need to select the SQL function and add the formula.
- Function is a user-friendly way to add a SQL function to the field.
- Custom Label and Summary Label both allow you to add headers to the saved search or saved search summary.

Highlighting & Available Filters
Both of these tabs are pretty self-explanatory. Highlighting allows you to highlight particular fields and apply conditional highlighting to help the user review and analyse saved search output.
Available Filters allow you to add the filters which users will be able to use to filter saved search outputs. Tick show as multi select to allow users to select multiple results.
This post should give you an overview of saved search basics and some tips to make them more user friendly. If you would like to learn more about saved searches, see our posts here to see examples of what NetSuite saved searches can be used for and also how saved searches can be integrated into processes
