Creating Workflows in NetSuite
This post follows our previous post explaining what are SuiteFlows and highlighting how they can benefit your business processes. This is a more technical post explaining the various elements that makeup SuiteFlows and how to configure them.
The three primary components underpinning SuiteFlows are:
- Workflow States represent the individual steps within a workflow. Each state corresponds to a specific action or a point in the process.
- Individual workflow states are connected using transitions. Transitions can be arranged to determine how data will pass through the various stages in a process.
- State Actions are applied to workflow states and establish what happens to the data during each state. State actions determine how users interact with the workflow.
How to create a basic workflow in NetSuite
- Create and Custom Fields required to be populated during any workflow states. These should be created on the relevant record type along with any required list values.

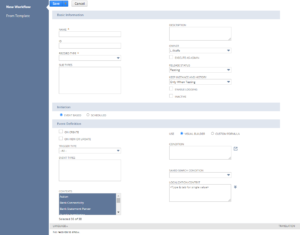
- Create the workflow. This can be done via Customisation>Workflows. When creating the workflow, you will need to define:
a. Define basic workflow information such as name, record type, trigger type etc
b. Define Workflow Initiation properties eg event based, trigger type etc. See below for more information on SuiteFlow triggers.
c. Define the Workflow Condition. This will outline the conditions that need to be present for the workflow to initiate.
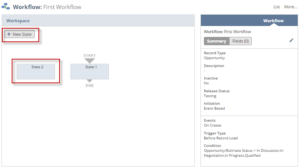
- Define workflow states and actions. Let’s use the example of a new vendor approval workflow:

a. State 1 could be called Approve and have an action to display a button labelled Approve. Conditions will be set to only show the button for certain users or roles. Use “Before Record Load” as the trigger and “Before Load” as the event type.
b. State 2 could capture the action when the button is pressed. This could be to set field values for “Entity Status” and “Entity Status Date” for example. It could populate fields based on your business process, such as changing “Pending Approval” to “Vendor Approved” setting the approval date and capturing the approvers name.
- Configure state transitions from state 1 to state 2 and link the transition to the “Approve” button action.
- Apply Workflow to Vendor Record
SuiteFlow Triggers
SuiteFlows can be triggered based on various events as follows:
- SuiteFlows can be triggered based on various events as follows:
- Record Events – Workflows can be triggered when records are viewed, created, or updated, ensuring seamless integration with your existing processes. Record based triggers include:
- Before Record Load will initiate an action before a record is loaded into a browser.
- Before Record Submit executes before saving a record to a database.
- After Record Submit activates a record that is saved to the database.
- Automatic Scheduling – Automate workflows to run at certain times or intervals
- Programmatic Execution – Utilise SuiteScript to trigger workflows
- Client Triggers activate when users interact with forms. These triggers enhance user engagement and streamline data input. Some examples of client triggers include:
- Before User Edit – executes as the record form loads, allowing changes before user edits
- After field edit – Happens after a user modifies a field’s value. Useful for dynamic updates based on field changes.
- Before User Submit – Executes before data is sent to NetSuite database upon user form submission. Ideal for validating field values.
This post has delved a bit further into NetSuite workflows and explained how they function in some detail. We hope after reading this post that you understand a but more about how they are configured, including the main elements of SuiteFlows, the steps you need to follow to set up SuiteFlows and the types of trigger you can use to initiate a SuiteFlow.
If you would like any more information about SuiteFlows, SuiteScript or any other technical aspects of your NetSuite instance then get in touch to talk to one of consultants and see how we can help.
